
The URL for this website/blog is 100coffeefacts.blogspot.com
Plan
I want the site to link in with the rest of the things I have produced, so obviously I will use basically the same information and images and what not. It will contain a selection of the facts from the book, but I won't include all because I still want the main focus of all this project to be that. I will use basically the same information on it as I have within the mini books, and also include a section which explains more about the book and gives previews.
Basic Layout
I have drawn out a few layout ideas as to how I could have the basic layout of the website, and then I will stick to them when producing each of the pages so that it will all visually link with each other.
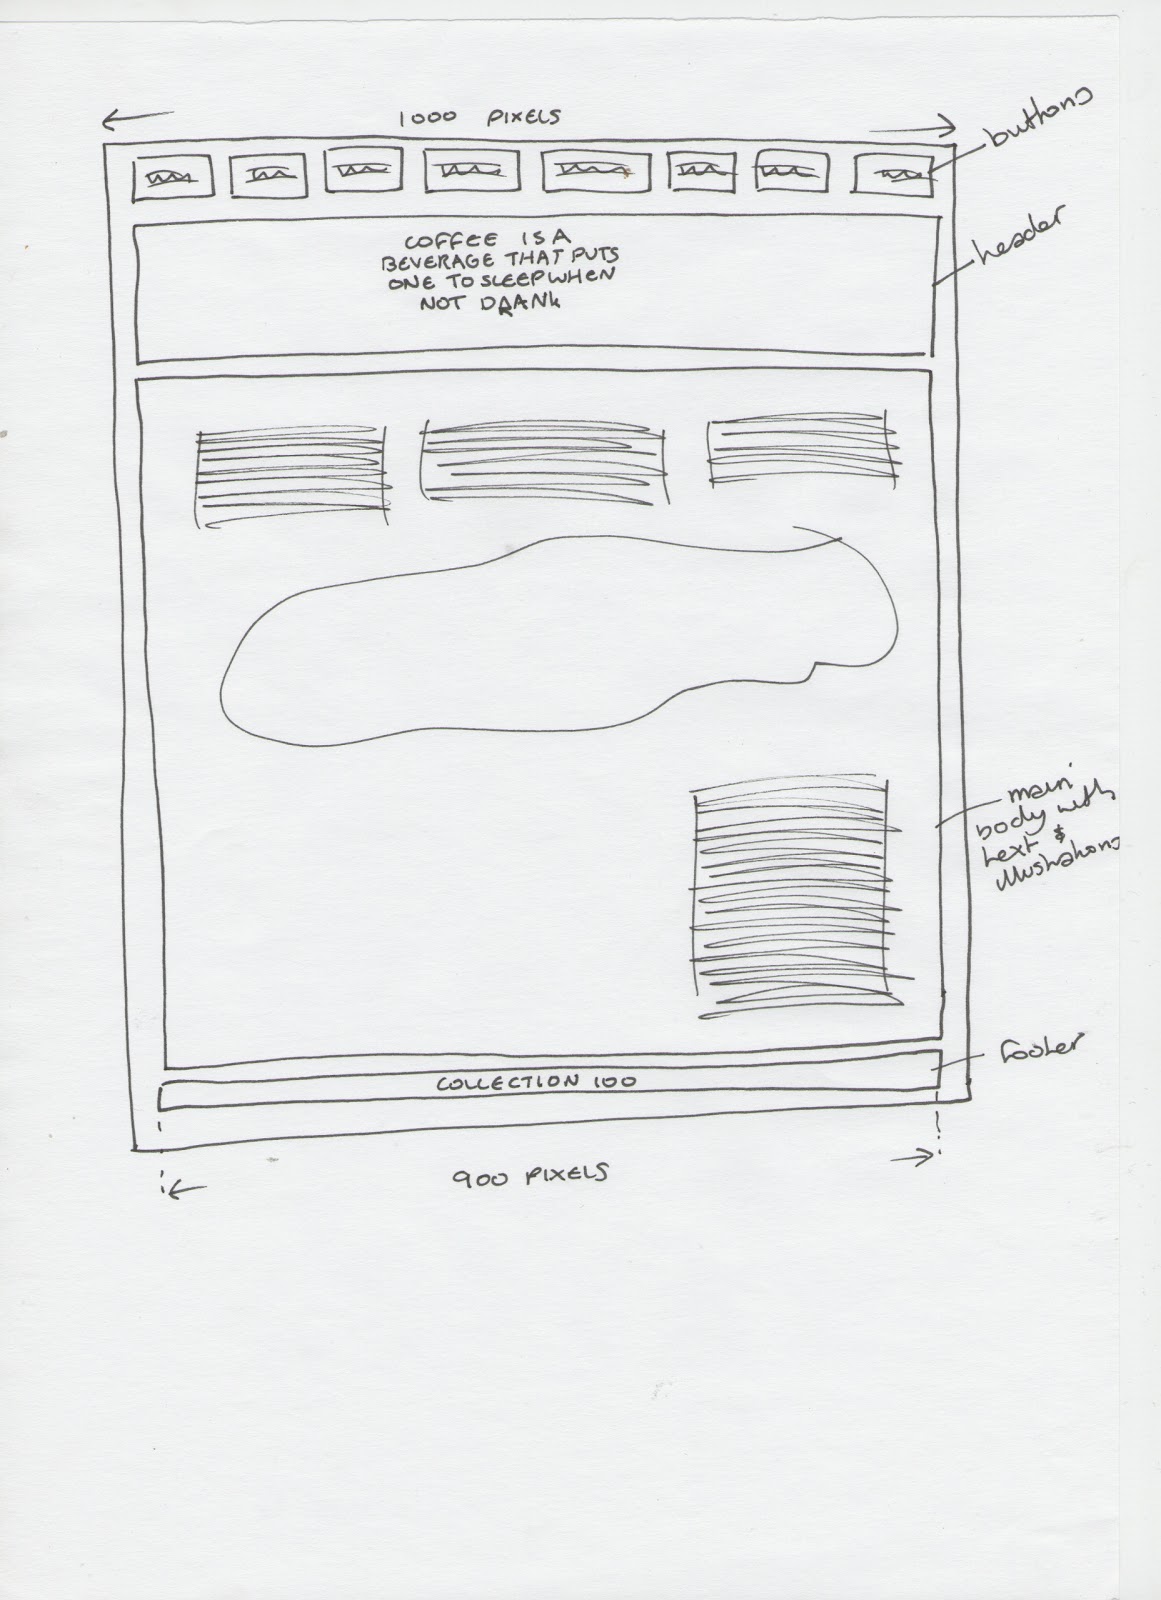


From the experiments I have made, the layout I will use will be:
Header
The header of my website will be the title of the book, which is the quote that I have used. I will use this and the coffee ring just the same as I have for the book. It will look like this:

Digitised version will be 900 pixels wide, which will be the width I use for the whole site, and it looks like this:

Footer
As well as having a header, each site has a footer where it basically explains who has designed it and what not, so I will basically have it the same as what I have on the back of my book and the mini books where it has my name and the project title. It will basically look like this:

Again, staying with the 900 pixels wide, the digitised version of the footer which will appear on each of the pages looks like:
Basic Set Up
To set up the blog so that I can get it to look as much like a website as I can, I went on to the design section and changed every setting, such as the background, text colour, etc to white. And the layout of it is so that at the top of just posts and then under it would be things like the archive and follow button, but I took these off because I don't necessarily need these on the site. So basically all that will be seen when clicking on the link will be a post, and then I will make buttons to navigate to different posts that will work as pages for the website.
Navigation Buttons
So because I have set up the blog so that there is nothing shown except the first post on the home page, I will design small navigation buttons which will appear on each of the pages so that the views can easily navigate through it to view each category and what not. They will just have the title of the category it is linking to, as well as a small version of one of the illustrations that is on the page to make them a little more visual, and obvious as to more what the category is of.
The basic layout of the buttons will look like this:

Here is each of the digitised buttons for each category.


They will appear on each of the pages n 2 rows of 4, and will be made to link to their own page. Here is how they look:

Home Page
This page will explain the purpose of the website, and what it is aiming to do, as well as containing a couple of the random general facts about coffee to start them off. I will have a small section at the top to explain the purpose, and then the coffee facts under this, and then below this will be a sentence explaining that to navigate through the website is to click on the buttons below it. I sketched out a few different ways of how I could have this look:

The digital version of this was again designed to be 900 pixels wide, and turned out to look like:

When the web page loads for this page, it comes up like this:

Category Pages
Each of the pages for the categories will hold the same information and same illustrations that the mini books do, that was it will keep it consistent all the way through. I will experiment on screen with the layout for how each will look.
Coffee Beans Page
After experimenting with the layout for the coffee beans page, I have decided it will look like this:

When the web page loads for this page, it comes up like this:

Coffee Countries Page
After experimenting with the layout for the coffee countries page, I have decided it will look like this:

When the web page loads for this page, it comes up like this:

Coffee Bean Process Page
After experimenting with the layout for the coffee bean process page, I have decided it will look like this:

When the web page loads for this page, it comes up like this:

Coffee Drinks Page
After experimenting with the layout for the coffee drinks page, I have decided it will look like this:

When the web page loads for this page, it comes up like this:

Other Uses Page
After experimenting with the layout for the other uses page, I have decided it will look like this:

When the web page loads for this page, it comes up like this:

Advantages/Disadvantages Page
After experimenting with the layout for the advantages/disadvantages page, I have decided it will look like this:

When the web page loads for this page, it comes up like this:

The Book Page
Once I printed and bound the book properly and took pictures of it for my final outcomes post, I put together this page. Originally I was going to set up links to be able to actually purchase the book but as time has ran away with itself, I have explained that in order to buy the book temporarily to simply email me. Maybe in the future after the deadline has passed I may add this link as I think it would be interesting to see if it actually worked. Here is how the page looks:

Here is how it looks when the page loads:

The URL for this website/blog is 100coffeefacts.blogspot.com
No comments:
Post a Comment